
How To Tile & Grout Like a Lady Boss
SHOP THE VIDEO
Tile | Grout | Trowel | Manual Tile Cutter | Wet Saw | Diamond Blade | Tile Adhesive | Bullnose Tile
Spacers | Grout Float | Mixing Bucket | Sponge | Tack Cloth | Grout Sealer | Tape Measure
Installing new tile is one of my favorite ways to refresh a tired kitchen or bathroom. If you hire a professional to tile your space, you may end up spending too much because you'll be paying a contractor by the hour to install it. But if you can muster the courage to try it yourself, tiling is actually a great bang-for-your-buck project (in terms of time and money) for a first-time DIYer. So roll up your sleeves, ladies. Let's get to tiling. Your dream tile is just a few hundred bucks and a little elbow grease away.
Step 1: SELECT YOUR TILING SURFACE
Selecting the correct tiling surface for your project is an important first step, and it can actually be a somewhat complex decision. For that reason, I'm saving it for its own separate post. Before you start your tiling project, make sure you've weighed your options and selected the right surface for your project. For this tutorial, I tiled directly onto some 3/4" plywood (which is okay under certain circumstances).
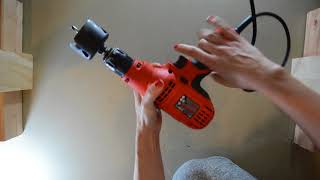
Step 2 : Remove jewelry
Don't forget to remove your jewelry before you get started. Cleaning off tile adhesive is no joke!
Step 3: Gather your supplies
Assemble the materials you need. Here's a shopping list you can take with you to Home Depot or Lowes. The items you need are also available online via the links in "Shop the Video" section above. Both homedepot.com and lowes.com allow you to order online and then pick up in store, which can save you a lot of time. As a working woman whose always tight on time, I utilize this service a lot and pick up my online orders during my lunch hour. Home Depot also offers tool rentals, which may make sense if you're only planning one project. But if there's even a possibility you may like to tile again in the future (which you might be more inclined to do after this tutorial), then it's a better deal to purchase the tools you need.
Step 4: spread tile adhesive with a trowel

Using a small tooth trowel for wall or backsplash tile or a large tooth trowel for floor tile, spread tile adhesive evenly over the tiling surface or directly on the tile. My preference is to put the adhesive directly on the tile -- if you spread the adhesive directly on the tiling surface, it often doesn't align exactly with where you are placing tile. This can result in unglued areas. Or, if you've spread adhesive on too much area at once, the adhesive can dry out (and lose its stick) if you don't lay the tile fast enough. Safer to just go tile by tile to make sure there is fresh adhesive covering each tile.
Step 5: Add spacers between tiles
Place spacers between each tile. Place only one end of the spacer between the tiles, as you will need the other sides to be accessible when it comes time for removal. For this project, I used 1/16" spacers (one of the narrowest spacers available) because I like the delicate look of narrow grout lines. Tile spacers come in a variety of sizes for you to choose from. The spacer size you choose will affect the type of grout you can use later in the project. If your spacers are wider, you may need a different type of grout (sanded grout). For more information on that, see my post on spacer size and grout selection (COMING SOON!). Make sure to place 2 spacers between each edge where tiles meet. This helps keep your project stable as you're working and prevents lines from becoming uneven if bumped before dry.
Step 6: keep going - you got this
Continue placing tiles with tile adhesive. This part can take some patience, but I've found that watching the process is fun and rewarding.
Step 7: Use bullnose tiles on exterior edges

If your tile edge is not adjacent to a higher profile surface (e.g. a cupboard or a corner) and will be visible once your tiling project has been completed, you should use bullnose tiles for those exterior edges. The bullnose edge of the tile is slightly rounded down to create a clean finish for exterior edges.
Step 8: Measure & Cut tile
The old adage, "Measure twice, cut once" certainly rings true for tiling. Measure carefully with a tape measure. Using another tile, draw a straight line between your measured and marked points of reference. When you're ready to cut, there are a couple methods you can consider:
A. cutting with a manual tile cutter
A manual tile cutter is perfect for simple cuts that are near to the center of the piece of tile. A manual tile saw has some benefits. First, no loud noise, which is great for late night tiling or tiling in an apartment. I spent many a late night tiling in our old condo and definitely appreciated being able to do so without waking the neighbors. Second, it's easier to operate and less expensive than a wet saw. If you're very lucky (like won the lottery lucky), you'll be able to tile your space using just a manual tile cutter, but odds are, you'll have to tile around a power outlet, or or vanity, or a toilet, or cupboard (the list goes on and on), and in that case you'll need a wet saw to make those more intricate cuts. In any event it's important to know how to operate a manual tile cutter.

First twist the handle of the tile cutter to the left to loosen its hold on the scoring arm. Once the scoring arm is loose, adjust it to the proper height. The scoring arm should be set at a height that allows the scoring blade to skim along the top of your tile about half a millimeter deep. Once you've found the proper height for your scoring arm, twist the handle to the right to set the scoring arm in place. Place the tile to be cut on the tile cutter, aligning your measured/marked line with the arrow at the top of the tile cutter. Grab the handle and moving from bottom to top, press and slide the scoring blade across the surface of the tile. Once the tile has been scored, lift the handle, and place the breaking bar across the scored tile pressing down hard. This will cause the tile to break along your scored line, and voilà, you've cut your tile.
b. cutting with a wet saw
Assuming your tiling project requires some more complex cuts or simple straight cuts close to the edge of the tile, you will want to use a wet saw. A wet saw is loud and uses a rapidly moving blade, so be sure to exercise caution from the moment your wet saw is plugged in. Don't forget to wear ear protection to protect your hearing. It's also important to wear eye protection to guard against the tiny shards of tile that often spray back as you're cutting. Before we get to cutting, let's take a look at the anatomy of a wet saw. (Note: All wet saws are slightly different. The wet saw depicted below is a Ridgid 120-Volt, 7" Wet Saw, which is the same one that I use at home. Be sure to read the detailed operation and safety instructions for your wet saw before beginning your project.)

Before you can start tiling, install a blade on your tile saw. When it comes to cutting tile, diamonds really are a girl's best friend. Tile and stone are very hard materials which can only be cut by a diamond blade. Next fill the water basin with water up to the fill line. Before filling, be sure that the plug at the bottom right of the water basin is pressed into place, otherwise you'll have a leaky mess. Before you start cutting tile, with the plastic guard down, try turning the saw on and off a few times so that you can get used to the sound and the spray of water. Be warned, water will spray toward you, and all over the floor. Make sure to wear grubby clothes you can get wet, and set up your machine in a place you're comfortable with getting soaked. Consider using a tarp to keep your work area dry. Whenever the saw is on, (1) keep your fingers away from the blade, (2) wear your eye and ear protection, and (3) keep the plastic guard down to minimize the water and tile shards that can shoot out from the blade.
Now, on to the cutting. If you will be cutting a straight line all the way across your tile, it can be helpful to use the alignment guide. The alignment guide allows you to lock a square line into place against which you can place and slide your tile. This is great for making sure your cuts square, and it's particularly nice if you're cutting a bunch of tiles of the same size. In that case, the alignment guide allows you to skip measuring once you've set the guide in the proper place. I personally prefer not to use the alignment guide unless I'm doing a lot of tile of the same size. Whether or not you're using the alignment guide, to cut the tile, turn on saw, then slide the tile toward the moving blade, aligning your measured/marked line with the line of the blade.
IMPORTANT TIP WHEN CUTTING FROM 2 OR MORE ANGLES:

If you're cutting a tile from two or more directions (or really any time you're cutting less than the full span of the tile), be sure to cut the tile with the shiny (finished) side facing up. Because the blade on a tile saw is circular, it does not cut directly up and down. Instead it moves in a circle, meaning that the bottom portion of the cut will be deeper than the top of the cut. If you cut from 2 directions with the shiny/finished side down, your cut will appear to be overcut, which is not the finished look you're going for.
Step 9: wait 24 hours
Once all your tile has been cut and glued. Take a break and wait at least 24 hours to give the tile adhesive time to dry.
Step 10: Put on latex gloves to avoid gator hands
Your tile is dry and it's time to get started with the grouting process. But before you do, make sure to put on latex gloves (or nitrile gloves if you're allergic to latex). If you don't wear gloves, the grout will dry out your skin like you wouldn't believe. To avoid the need for 10 manicures, just wear gloves. Then after you're done, treat yo'self to 1 manicure to celebrate your fresh new tile.
Step 11: Mix grout & wait 5-10 minutes
Mix your grout with water in a disposable plastic bucket using a stir stick. For this project, I used Polyblend non sanded grout in platinum. Your grout package will have a recommended grout to water ratio, but in practice I've found that it's better to add water slowly while stirring until the grout is the consistency of peanut butter. Once mixed, let the wet grout stand in the bucket for 5-10 minutes to soak up any remaining dry grout. Then give it another quick stir, and you're ready to apply.
Step 12 : remove spacers and apply grout with float

Next, remove the spacers (this is why we needed the ends sticking up). Scoop some grout onto your grout float, and spread the grout on the tile at a 45 degree angle, pressing the grout into the spaces between tiles. Grout floats come in a variety of shapes and sizes. There's no right or wrong float for any project. You should select the float that feels good in your hand and is the right size for your project. In this project, I used a small float that can be good for narrow detail areas that require some precision. Once the grout has spread evenly over the the tile seams, use the float at a 90 degree angle to scrape the excess grout off of the tiles. Note that you should only apply grout to small areas at a time, say 1 to 2 feet at a time. Otherwise, you risk the grout drying before you can adequately scraped it off.
Step 13: wait 5-8 minutes then wipe with damp sponge
Once you've applied the grout (to a small area) wait 5-8 minutes to allow the grout to set a bit. Then, using a slightly damp sponge, gently wipe the tiles and the excess grout from the edges of the seams. Make sure that the sponge isn't too wet and that you don't press too hard. Otherwise you risk wiping away too much of the grout.
Step 14: Wait 24 hours, then wipe haze with tack cloth
Wait another 24 hours for your grout to set. During that time, a light haze of left over grout dust will have developed over your tile. Using tack cloth (a miraculous product that deserves its own post at some point), wipe the tiles clean. Tack cloth is kind of like cheese cloth, but it's sticky, which is wonderful for cleaning up any kind of dust, especially grout dust.
Step 15: Seal grout & wait 24 hours before exposing to water

Finally it's time to seal your tile and grout. Sealing is extremely important, especially for shower and bath tile, because it keeps water from penetrating your newly installed tile. Indeed, it doesn't hurt to reseal any tile in your house from time to time (especially in bathrooms) to make sure that the seal remains strong. To seal the tile and grout, spray grout sealer onto the newly tiled area, making sure that every grout seam is treated. Once the area has been sufficiently covered in sealer, lightly wipe away the excess. Then wait 24 hours before exposing your tile to water.
Step 16: Enjoy your new tile
All done, ladies! Time to sit back, appreciate your beautiful new tile, and bask in the joy of knowing that you did it yourself, you lady boss, you!
DISCLAIMER: POWER TOOLS ARE DANGEROUS AND SHOULD ALWAYS BE OPERATED WITH CARE. BE SURE TO READ ALL INSTRUCTIONS FOR YOUR SPECIFIC TOOLS. I AM NOT A PROFESSIONAL CONTRACTOR. THE TECHNIQUES DISCUSSED ABOVE ARE THE ONES THAT HAVE WORKED WELL FOR ME, BUT (1) MAY BE INCONSISTENT WITH THE RECOMMENDED METHODS FOR YOUR SPECIFIC TOOLS, OR (2) MAY NOT BE APPROPRIATE FOR YOUR PROJECT. CONSULT YOUR OPERATOR MANUALS AND REVIEW ALL SAFETY INSTRUCTIONS BEFORE STARTING YOUR PROJECT.


Comentários